Miktysh Blog.
Your go-to source for everything records management, eDRMS, Office 365, TRIM/Content Manager, RecordPoint, AvePoint, and EncompaaS related.
How to Set Up an Office 365 Data Loss Prevention Policy

You’ve moved your files to Office 365. Now keep it there. Here’s how to set up an Office 365 Data Loss Prevention policy to protect your data from leaving your organisation or from a data breach.
The move is complete. You’ve finally gotten all your on-premises data off the network drive into Office 365. You’re reaping the productivity benefits; your organisation is a lean, mean, collaborating machine. Now it’s time to step the game up once more by protecting and governing your data with Office 365 Data Loss Prevention policies.
Data Loss Prevention (DLP) is an out-of-the-box Office 365 service which allows you to define policies about what can and cannot be done with certain types of data. With DLP policies in place, Office 365 can scan your organisation’s documents for pre-defined patterns of sensitive information to allow you to identify, monitor, and protect that data.
Some of the top use-case scenarios for DLP policies include:
- Compliance with regulations such as GDPR, HIPAA, HRIP, and other data-privacy regulations
- Warning users when they are about to share potentially sensitive data
- Preventing sensitive financial data from being shared outside certain departments
- Preventing accidental sharing of documents containing credit card numbers
- Identifying where sensitive data exists in your organisation
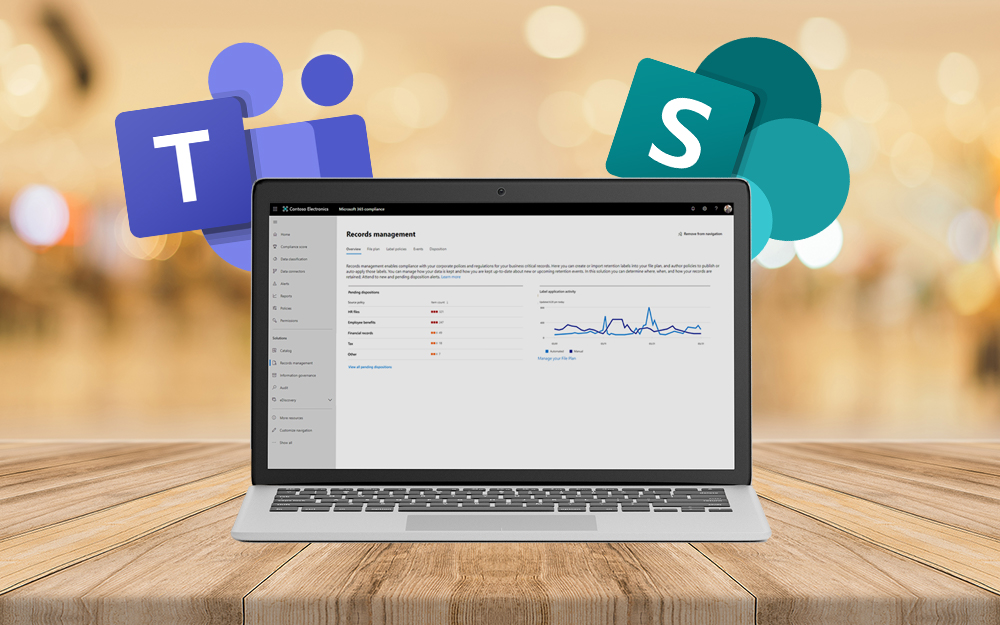
DLP policies can be applied wherever your data is stored in Office 365:
- SharePoint Online
- Exchange Online
- OneDrive for Business
- Microsoft Teams
How to Set Up a Custom Office 365 Data Loss Prevention Policy
It all starts in the Office 365 Admin Center, where you’ll find a link to the Office 365 Security and Compliance Center. Here, you’ll find the DLP tab where you can create a policy. One of the first things to notice is that Microsoft provides several DLP policy templates out-of-the-box. You can filter these by country and category (such as financial, medical and health). A full list of out-of-the-box templates can be found here.
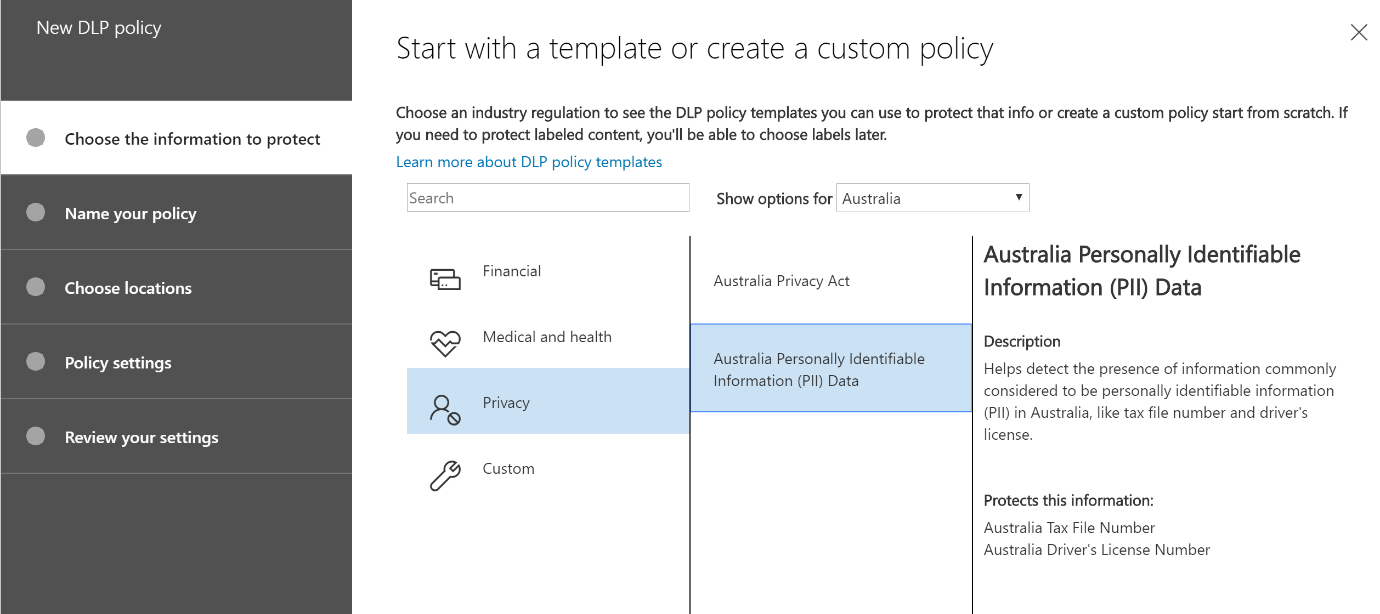
These templates can be used as-is or customised to fit your exact requirements. You can also create an entirely custom policy from scratch. This is extremely useful to organisations who want to protect information and files based on an internal policy, rather than government regulation, or simply want to generate reports to find out where certain types of information are being stored across Office 365.
Let’s look at creating a totally custom Office 365 Data Loss Prevention policy. In this example, we want to find instances of our organisation’s Employee ID number, which has a format of 11-AA-1111, where ‘1’ means a number and ‘A’ means a letter. Here are the steps to creating a custom DLP policy to match our employee ID format:
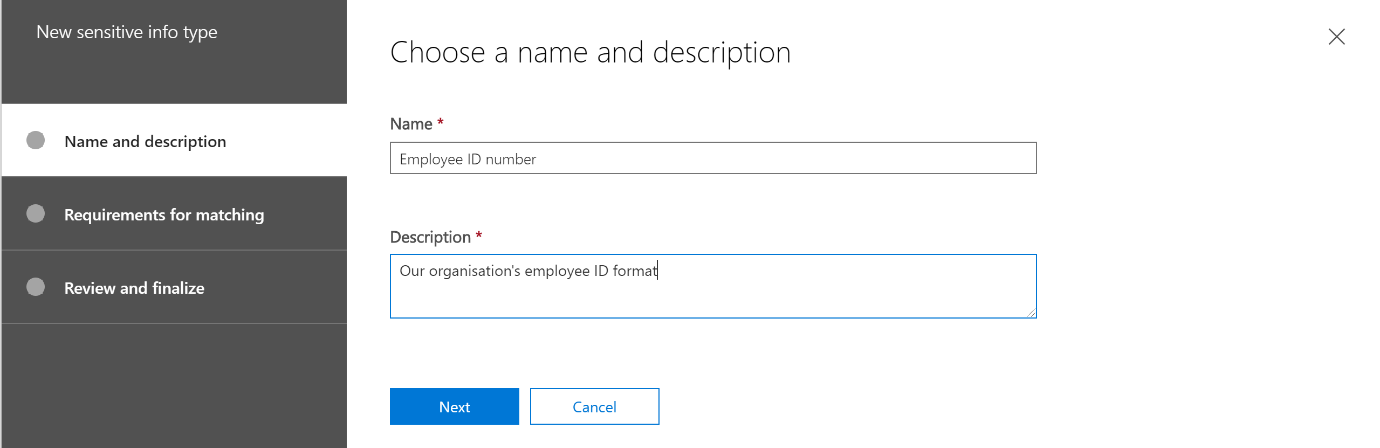
1. Create a New ‘Sensitive Information Type’ and Give It a Name
Since we’re creating a totally custom policy not based on any universal or governmental format, we’re going to need to define a pattern for identifying our organisation’s employee IDs. From the Office 365 Security and Compliance Center, expand ‘Classifications’ in the left-hand menu, and select ‘Sensitive info types” then “Create”.
2. Create a New ‘Matching Element’
Add a new matching element and select ‘regular expression’ from the dropdown. A regular expression allows us to define a pattern, such as 11-AA-1111. This article won’t get into the details of forming regular expressions, but I recommend using a tool such as https://regexr.com/ to help create and test expressions.
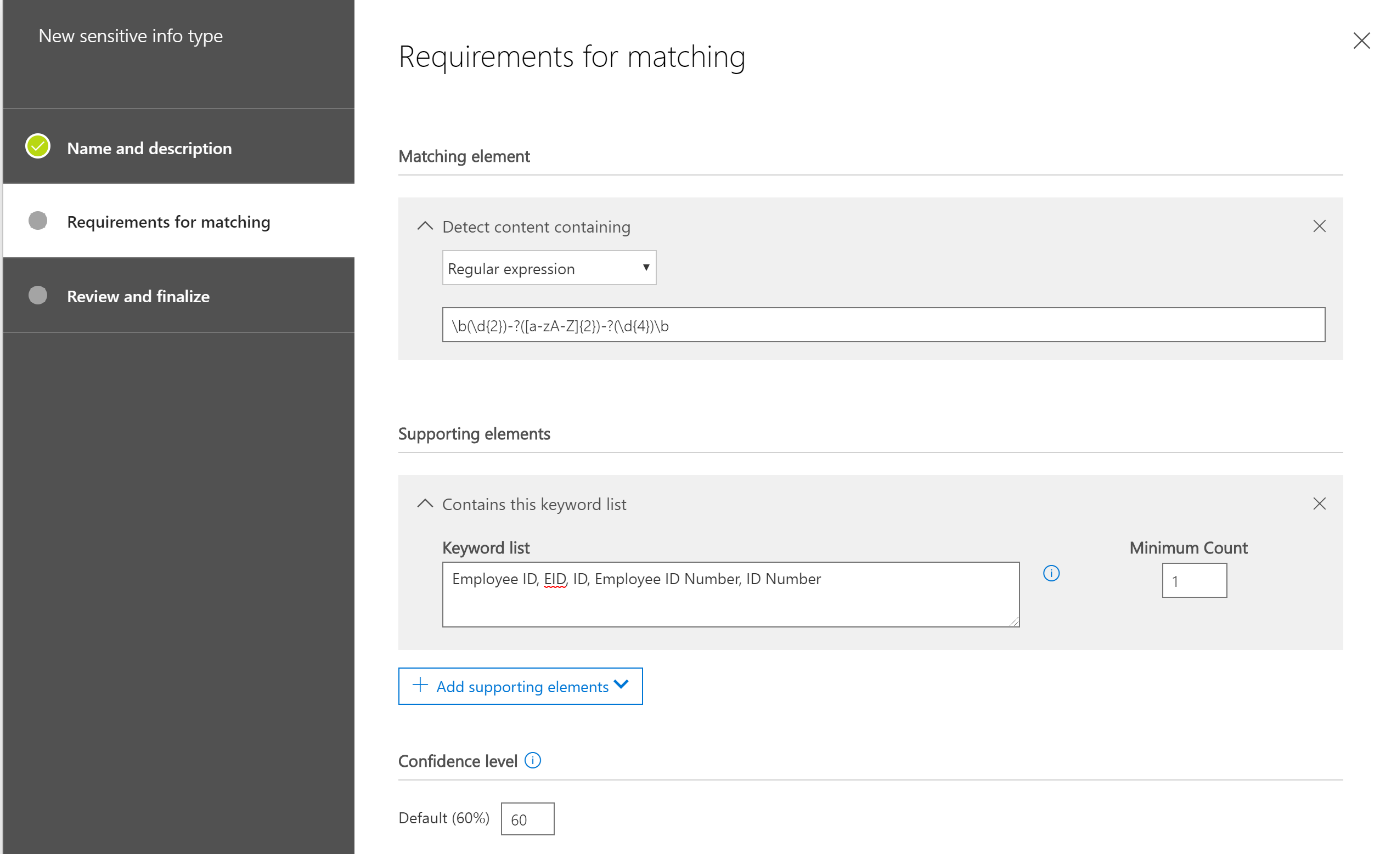
Here we’ve also set a list of keywords as supporting elements. If the Office 365 finds one of these keywords in a document, it will flag it as potentially sensitive and apply our policy. We can also set a confidence level, which can be important to test and fine-tune in order to strike a balance between usability for employees and strictness of policy matches.
3. Create a Custom DLP Policy and Give It a Name
After creating your sensitive info type, expand the ‘Data loss prevention’ tab and select ‘Policy’. Choose ‘Custom’ in the templates menu then ‘Create’.

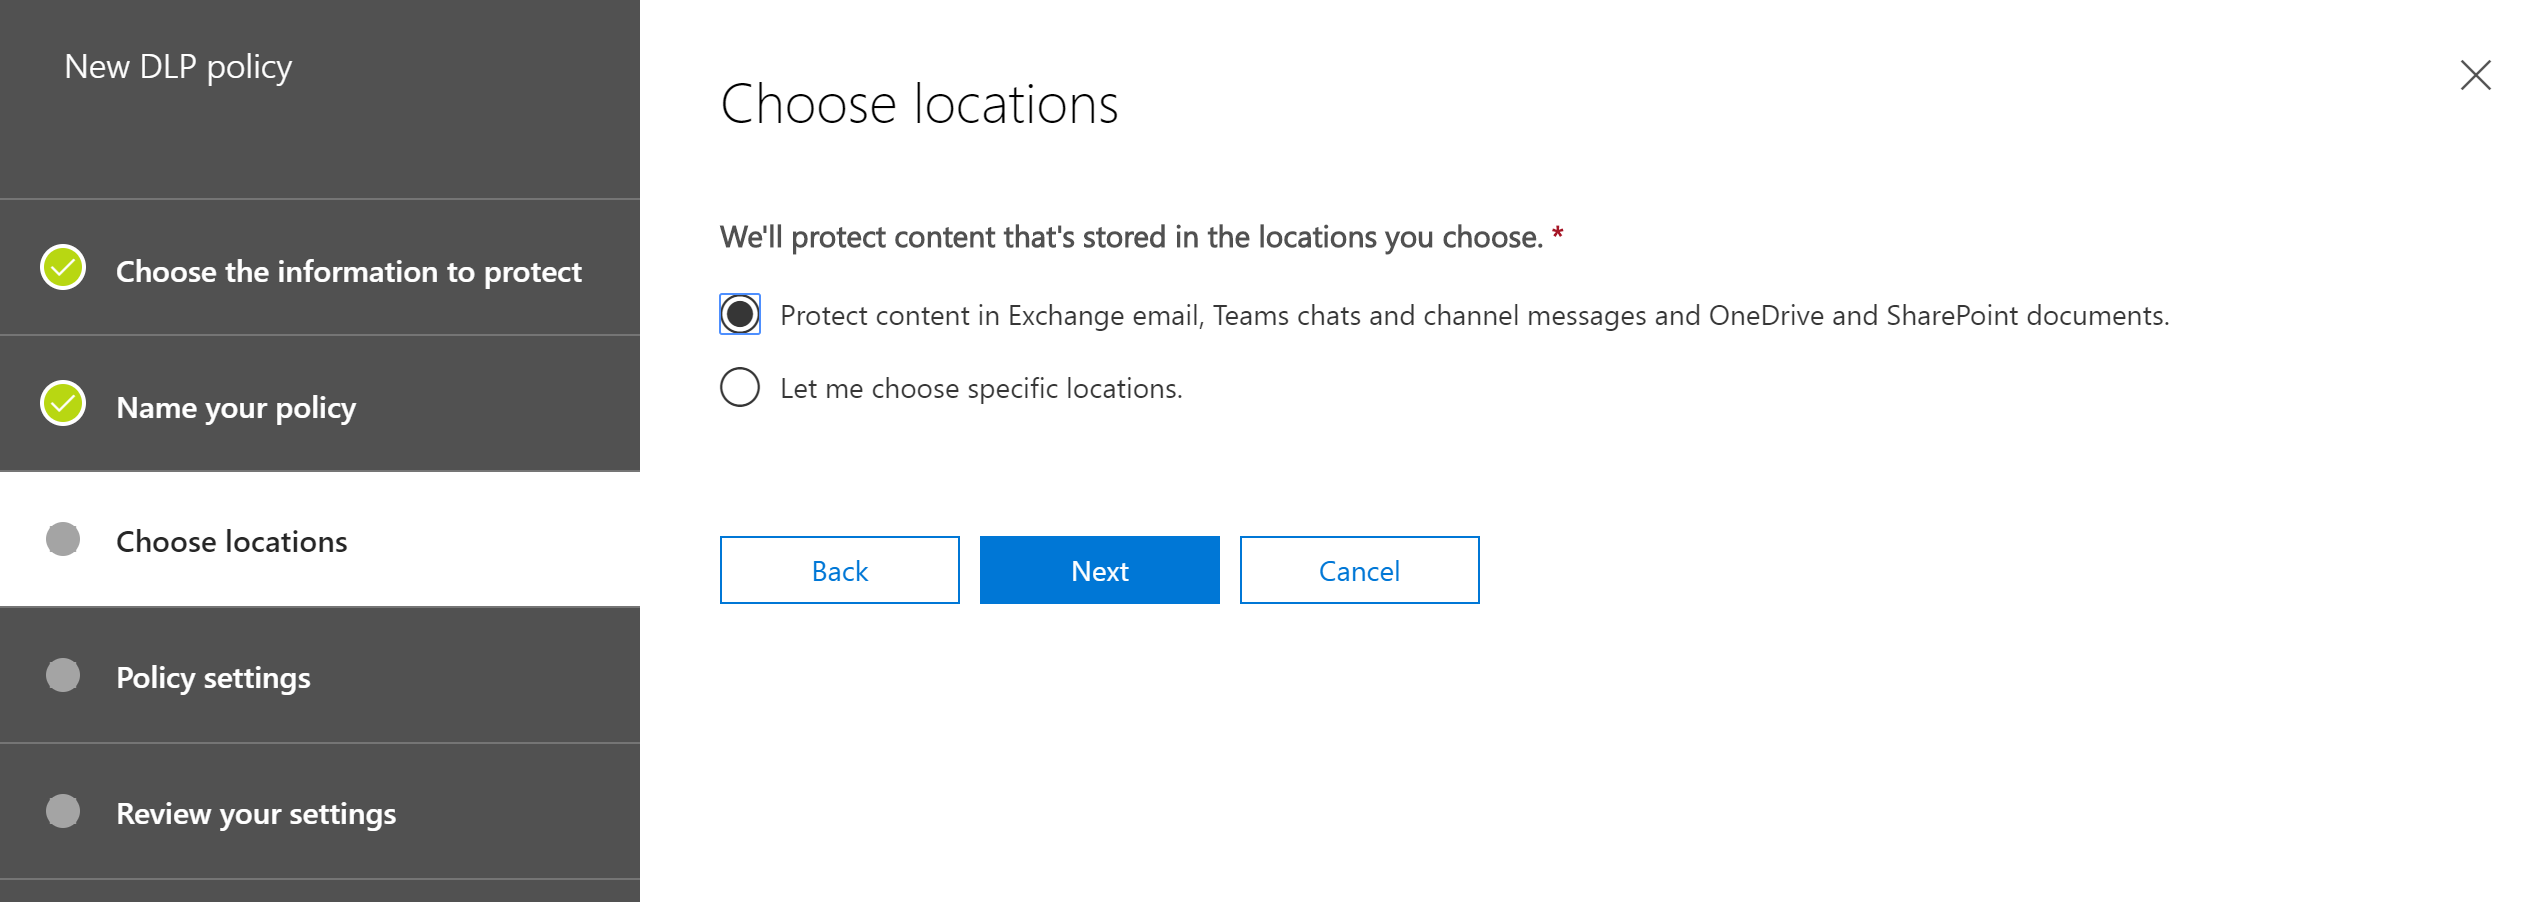
4. Choose Which Office 365 Services to Enforce the DLP Policy On
You can choose to enforce your DLP policy on certain Office 365 services or across the entire Office 365 suite. We’ll protect across Office 365 in this example.
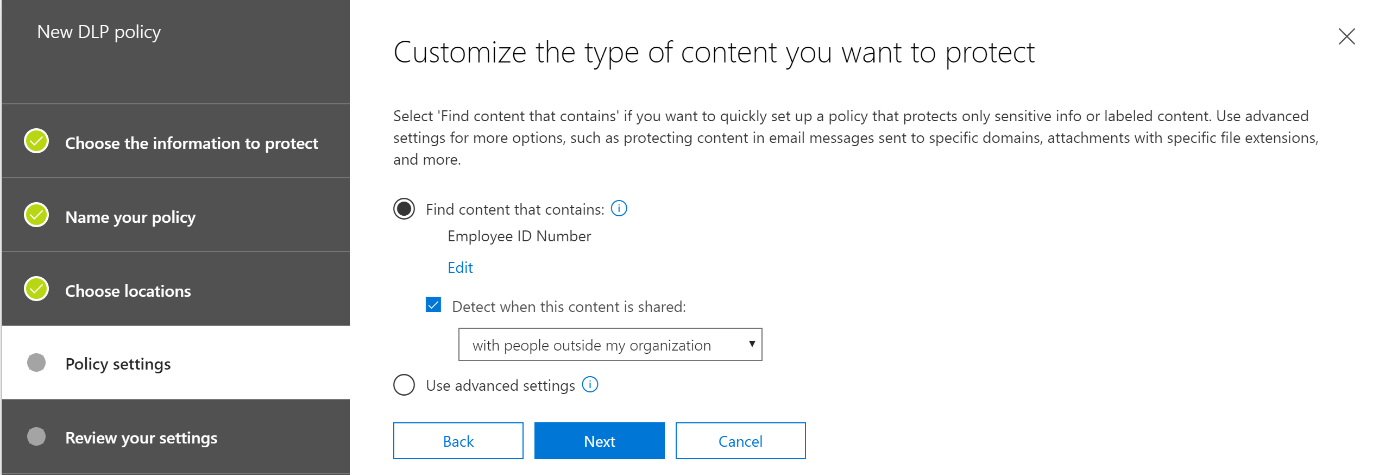
5. Set the DLP Policy to Find Sensitive Content
Under ‘Find content that contains’ choose ‘edit’ and search for the newly created ‘Employee ID Number’ sensitive info type.
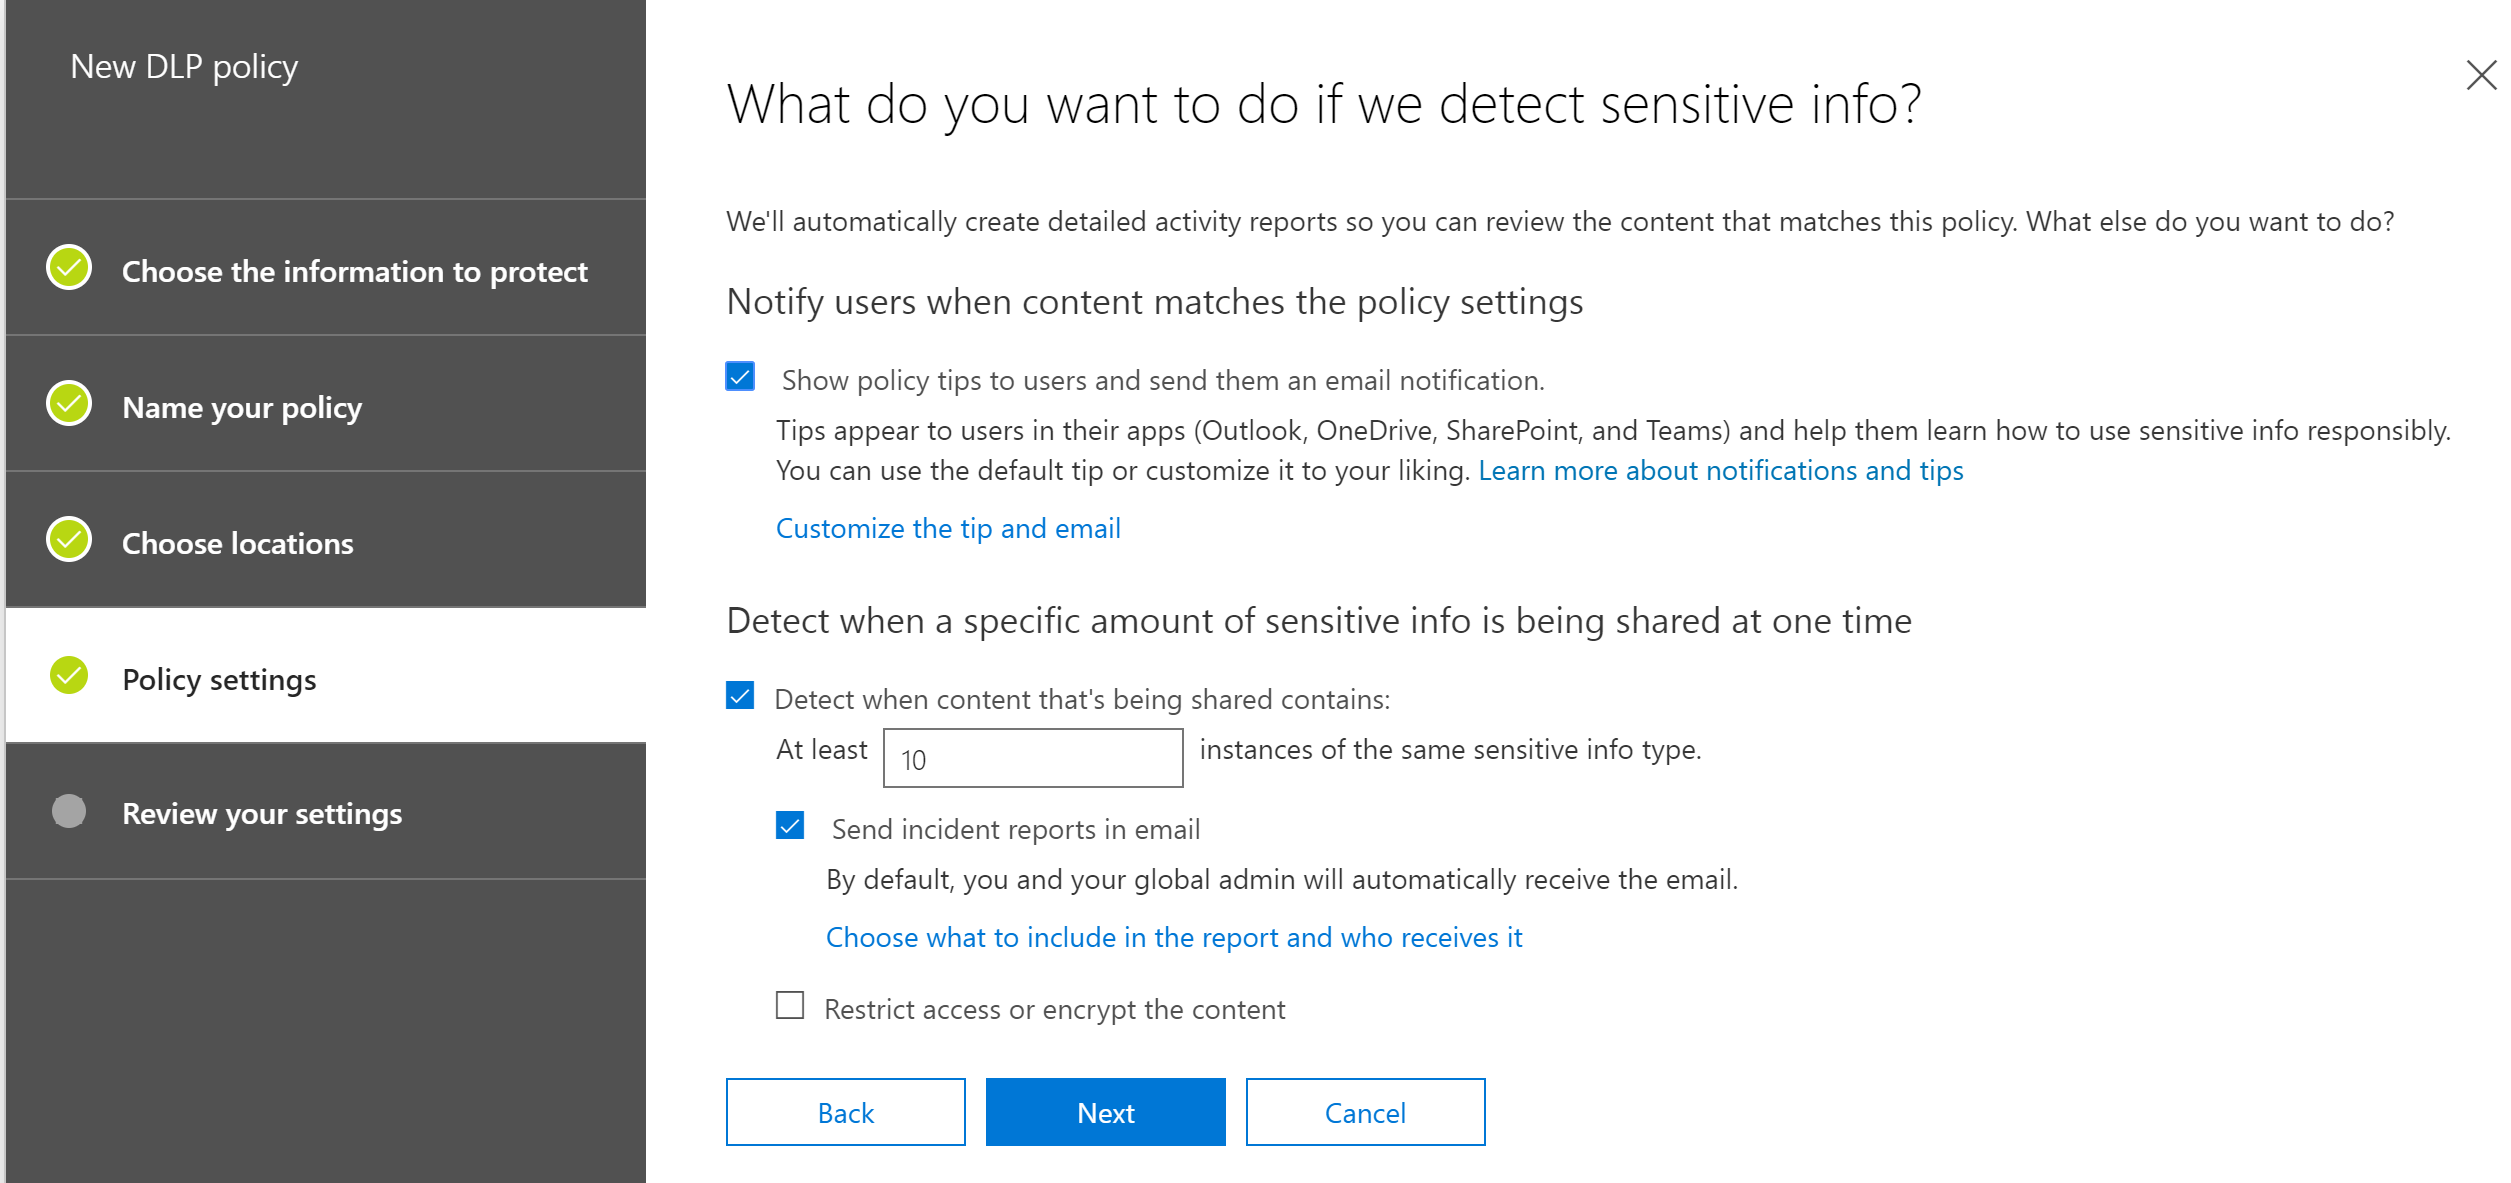
6. Finish Policy Settings and Begin Testing
Choose what you want to happen when the Office 365 Data Loss Prevention policy is met. Here, you can also configure reporting settings, including what is reported and to whom. The DLP policy is now ready to test.
Rolling Out and Finessing Your Office 365 Data Loss Prevention Policy
Now that your policy is in place, it’s time to start testing and fine-tuning. There are a few main factors to consider.
- Employee usability – are people getting annoyed and taking their documents offline?
- False positives – are your matching rules too broad?
- False negatives – are your matching rules too narrow?
- Employee knowledge – do users need more training?
The direction of your tests should, of course, be influenced by the end goals and requirements of your DLP policy. A policy that’s in place to comply with heavily-penalized legal regulations may favour broad-matching and false-positives over user-friendliness – better safe than sorry. On the other hand, an organisation might want to add an Office 365 Data Loss Prevention policy exception for the finance team for a policy that matches financial information so as not to become the bane of their existence.
Starting by rolling out your Office 365 Data Loss Prevention policy in test mode allows you to gather data through reporting and introduce features such as policy tips (notifications to users), content blocking, and more over time as you fine-tune according to your data.
Let us help you get started!
One of the easiest ways to get started is to go through the list of predefined DLP policy templates and start thinking about the ones that match your organisation’s needs out-of-the-box, and where you might need to extend the functionality.
Whether you’re ready to fully implement a policy, or just start gathering data to gain a better understanding of what your Office 365 data contains, get in touch with us to start taking full advantage of Office 365’s data capabilities.

Michael Schloman
Executive Director
As co-founder and Executive Director at Miktysh, Michael oversees the organisation’s strategic direction. Michael is entrepreneurial by nature and has a proven track record of driving business growth. His passion for delivering results through relationships, collaboration and exceptional customer service is evident through the numerous accolades won by Miktysh. His education and years’ of experience have equipped Michael with a deep understanding of the IT & records and information management sectors, and what it takes to run a successful technology firm in Australia.
Follow us on social

Popular content.


Analytics Driven Information Governance
14.07.2021

The New Normal Requires Zero Trust
27.06.2021


Microsoft 365 Records Management Whitepaper
06.11.2020


Micro Focus Launches Content Manager Select
28.05.2020

Content Manager SharePoint Integration Demo
20.05.2020


Top 7 Hidden Features in Microsoft Teams
11.02.2020

Integrate Content Manager with SharePoint
15.01.2020


Information Management Strategy Example
06.12.2019


How to Approach a Digital Transformation
13.11.2019


Top 5 Benefits of Migrating to Office 365
10.10.2019


Content Manager 9.4 Sneak Peek – Video Demo
02.09.2019


What Version of SharePoint is on Office 365?
27.06.2019


New SharePoint 2019 Features
08.03.2019


Data Migration Validation Best Practices
08.02.2019


Cloud Governance – RIMPA Queensland Event
27.09.2018


RecordPoint Records365 Demo
09.05.2018

How RecordPoint Enhances Office 365
09.05.2018


6 GDPR Tools to Assist with GDPR Compliance
17.04.2018

Analytics Driven Information Governance
14.07.2021
The New Normal Requires Zero Trust
27.06.2021
Microsoft 365 Records Management Whitepaper
06.11.2020
Micro Focus Launches Content Manager Select
28.05.2020
Content Manager SharePoint Integration Demo
20.05.2020
Top 7 Hidden Features in Microsoft Teams
11.02.2020
Integrate Content Manager with SharePoint
15.01.2020
Information Management Strategy Example
06.12.2019
How to Approach a Digital Transformation
13.11.2019
Top 5 Benefits of Migrating to Office 365
10.10.2019
Content Manager 9.4 Sneak Peek – Video Demo
02.09.2019
What Version of SharePoint is on Office 365?
27.06.2019
New SharePoint 2019 Features
08.03.2019
Data Migration Validation Best Practices
08.02.2019
Cloud Governance – RIMPA Queensland Event
27.09.2018
RecordPoint Records365 Demo
09.05.2018
How RecordPoint Enhances Office 365
09.05.2018
6 GDPR Tools to Assist with GDPR Compliance
17.04.2018
Follow us.
Stay in touch.
Australia wide.


